Day 3: Building Continues
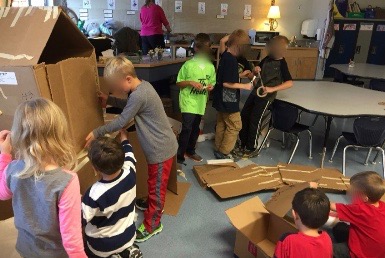
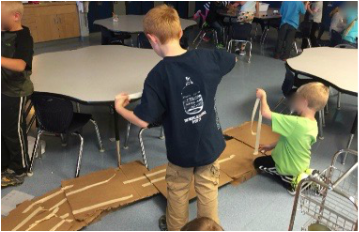
Construction of the castle was completed at the end of Day 3. C. decided the castle needed a “hide and seek door” and N. wanted a bridge. The rest of the crew were more than happy to help out. They’ll have a chance to finish tomorrow.
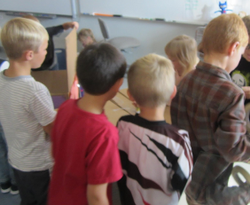
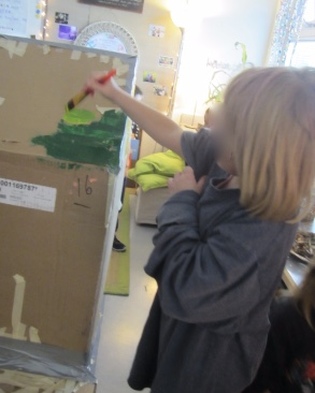
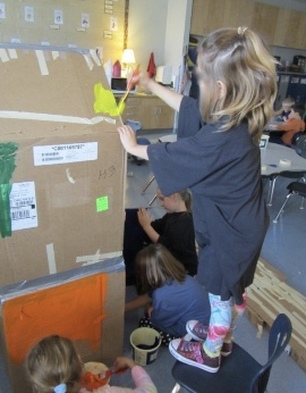
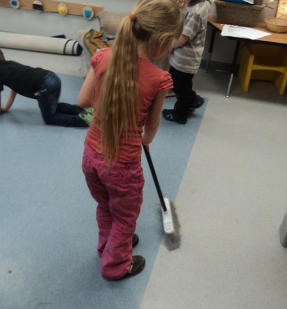
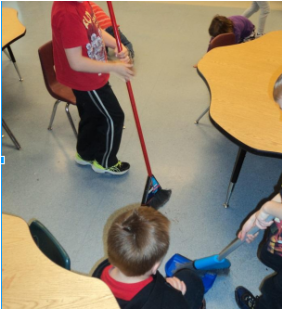
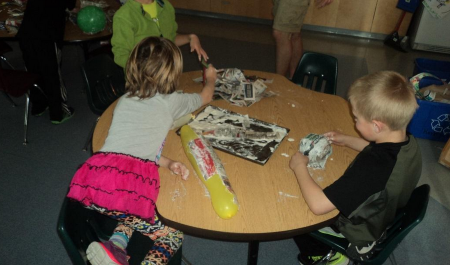
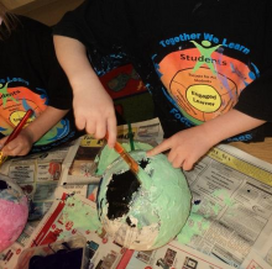
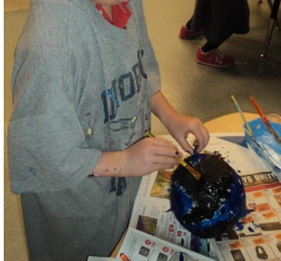
Day 4: Construction Ends and Decorating BeginsThe construction team finished building their bridge and tested to make sure it didn’t fall apart when we moved it. While they finished, the decorating crew met to talk about how they wanted to start. They felt that it would be a good idea to paint first. We made a plan of what colour to paint and where. They divided up the jobs and got to work.
M.- "I hope I don’t fall." Mrs. Rauscher- "You missed a spot up there." H.- "I can’t reach." K.-"I can help."
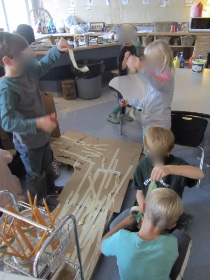
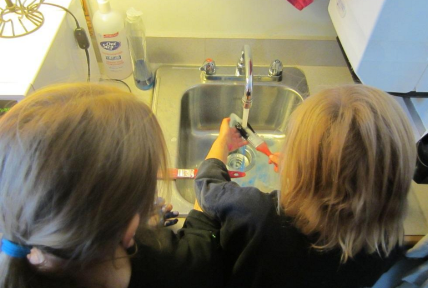
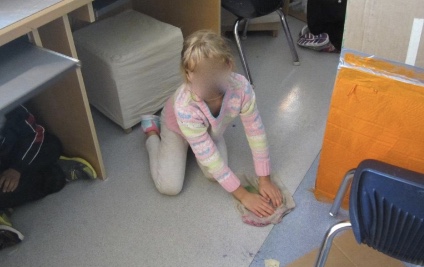
The decorating crew were responsible for cleaning up their own messes. Thank goodness we had paint shirts. The painting crew worked so hard, they barely said a word. However, they got the job done and started planning for tomorrow – painting the bridge, making bricks, and adding sparkles and stickers.
0 Comments
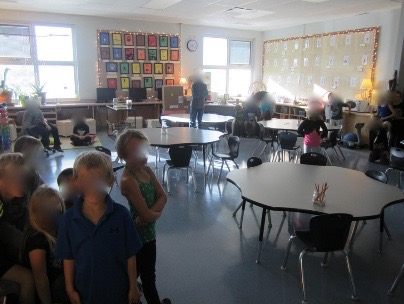
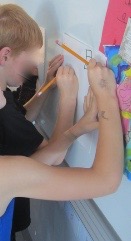
Provocation: Three large boxes were brought into the classroom and left there for a week. The children were curious about the boxes and asked to interact with them. Some of the children wrote on the boxes, some glued paper onto the boxes, and some hid inside of the boxes. All of the children worked independently with no clear goal in mind. The following week, Mrs. Rauscher wanted to throw away the boxes as they were getting in the way. The children adamantly refused. Our first project of the year has begun! Day 1 - Planning: The grade 1 class had to collectively decide what they wanted to do with the boxes. Each child was given a piece of paper and asked to write down their idea and what the shape they wanted their idea to look like. Curriculum Connection: Language Arts 1. explore and share own ideas on topics of discussion and study 2. follow spoken directions for gathering ideas and information 3. generate and contribute ideas for individual or group oral, print and other media texts Math (Shapes and Objects) 1. replicate composite 2-D shapes and 3-D objects All of the ideas were presented to the children and written on the board. Now it was time for a vote - the students were given the option to change their mind if they liked someone else’s idea better than their own. Curriculum Connection: Language Arts 1. Follow spoken directions for gathering ideas and information 2. Ask questions and contribute ideas related to class investigations on topic of interest Social Studies 1. Collaborate with others to devise strategies for decision making and problem solving 2. Apply ideas and strategies to contribute to decision making and problem solving 3. Consider the ideas and suggestions of others 4. Respond appropriately, verbally and in written forms, using language respectful of human diversity
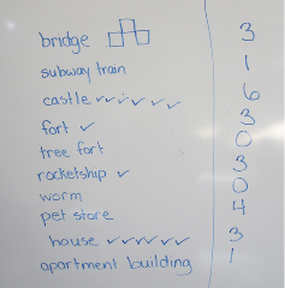
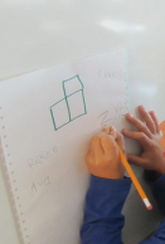
Now we had to agree on how the boxes should be stacked to build our castle. Mrs. Rauscher drew diagrams of all the available options and the children were invited to come up and write their names on the shape that they liked best. Curriculum Connection: Language Arts 1.follow spoken directions for gathering ideas and information 2.Ask questions and contribute ideas related to class investigations on topic of interest Social Studies 1. Collaborate with others to devise strategies for decision making and problem solving 2. Apply ideas and strategies to contribute to decision making and problem solving 3. Consider the ideas and suggestions of others 4.Respond appropriately, verbally and in written forms, using language respectful of human diversity
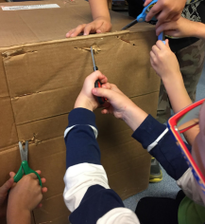
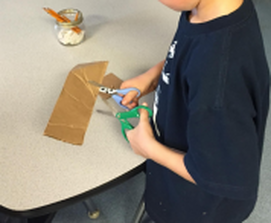
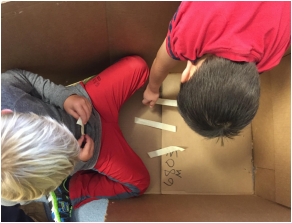
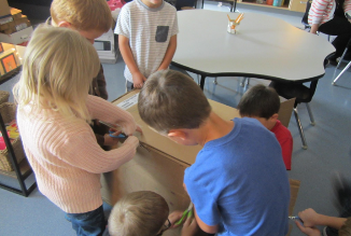
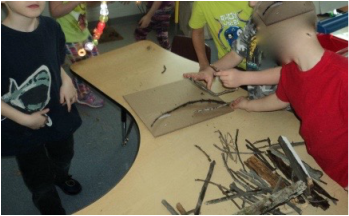
 Now that the students had established what they wanted to build and how they wanted it to look, we decided to form committees to get this project underway. Three committees were formed: the building committee, the decorating committee, and the costume committee. The children met with their committees to discuss the things they would need to complete their job. A recorder was assigned in each group who was responsible for writing down their team mates ideas. While the children were engaged in discussion, Mrs. Rauscher used Google images to show the children different examples of castles to help inspire the students’ imaginations. Day 2: Building Begins Curriculum Connection: Science (Building Things) 1. Construct objects and models of objects, using a variety of different materials 2. Identify the purpose of different components in a personally constructed object or model, and identify corresponding components in a related object or model - select appropriate materials, such as papers, plastics, woods; and design and build objects, based on the following kinds of construction tasks; - construct model buildings; e.g. Homes (human, animals, from other cultures), garages, schools The building team met one more time to go over their list of needed materials. They added some things that their classmates suggested and read the list out to Mrs. Rauscher so that she could gather the materials. The kids were anxious to get started and each grabbed scissors and tape. The kids each started cutting, forgetting the shape the boxes were supposed to take. It was chaos! We took a short time out to discuss what the original design was supposed to look like. The kids stacked the boxes to match their diagram. All at once the ideas started to flow. The construction crew independently broke into two groups: one worked on the 2 boxes that formed the bottom of the castle and the other worked on the top box.
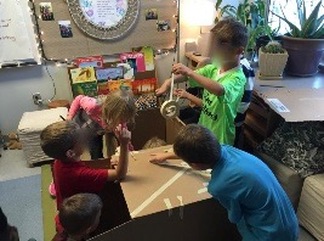
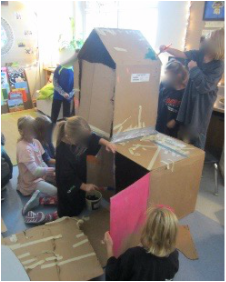
As the students continued to build, they became more and more creative with their thinking. They brought the other box over and decided to cut out the sides so that they could connect the boxes One student recognized an immediate problem: “If we cut the wall off, we’ll lose the door!” Her teammates immediately got to work solving the problem – they rotated the second box so that the flap of the second box would serve as a door for the first box. It was incredible to watch them independently and successfully solve problems by listening to the various ideas that their teammates came up with. 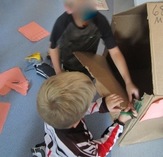 The group working on the top of the castle wanted to make a pointy top just like the castles we saw on Google. They found a simple yet innovative way to accomplish this.
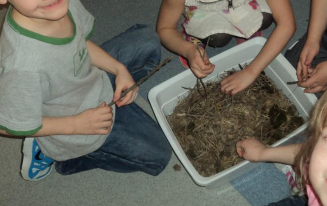
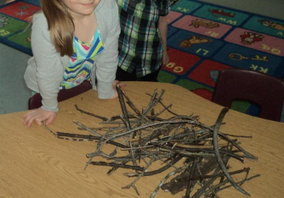
Mrs Rauscher: Now what are you doing? C: We want a way to get into the top! Stay tuned for more updates about this project!  Our project began after we read the book, "Mama built a little nest", by Jennifer Ward. “There are so many different kinds of birds—and those birds build so many different kinds of nests to keep their babies cozy. With playful, bouncy rhyme, Jennifer Ward explores nests large and small, silky and cottony, muddy and twiggy—and all the birds that call them home!” ~http://www.amazon.ca The children were so intrigued by the variety of nests. We picked our favorites and learned about the birds that lived in these nests. The children chose: a nest made out of mud (flamingo), a nest that floats in the water (grebe), a nest made out of a hole in the ground (burrowing owl), and a nest made of giant sticks (bald eagle). The pictures in the book are fabulous, but they weren’t real photographs. We were curious to know what these nests really look like. Google came to the rescue. The children quickly learned which birds matched which nests  The children were so excited about nests that they began to make their own nests at recess. With all of this genuine interest, Miss Holman and Mr. Lantz knew they would have to take this idea further. First, we made a list, posing this problem to the children: what do birds need to make a nest? The kids were full of ideas:
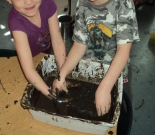
While the kids were sorting, we heard and saw the most interesting things.
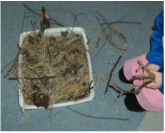
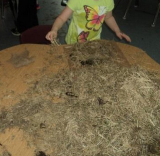
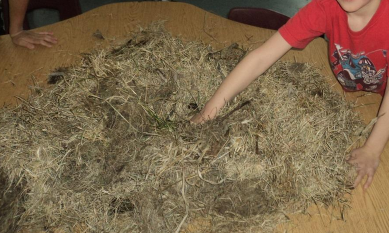
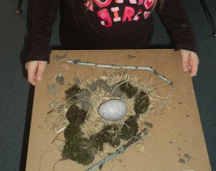
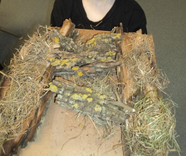
After we sorted, it was time to build. The kids were each given a piece of thick cardboard as the base. They were free to build with any materials with only 2 conditions:
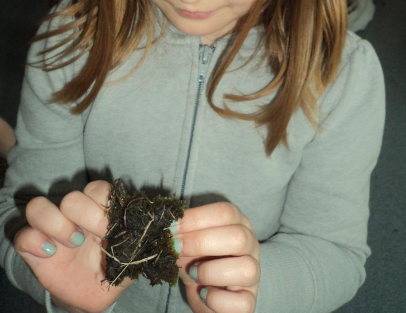
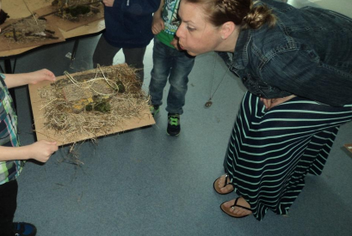
Can the nests survive the “wind test”?
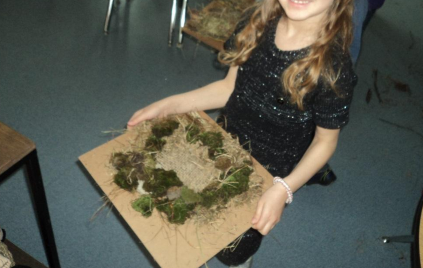
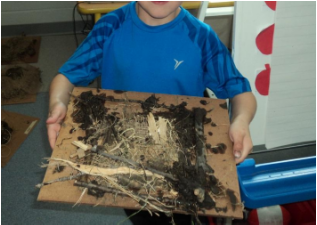
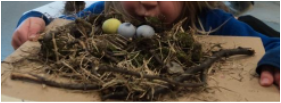
The kids were very imaginative and did an excellent job. Here are some of the nests after Day 1:
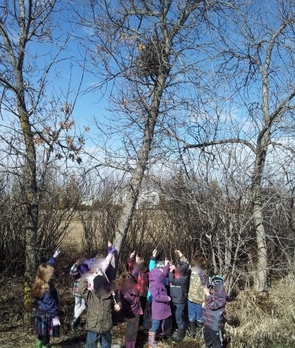
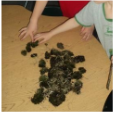
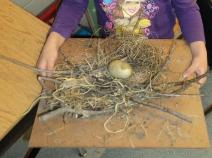
As Day 2 began, we took a moment to look at some real nests. Mrs. Sterling, Mr. Lantz, and Miss Holman had brought in some nests that we found abandoned at home. The children we asked to observe the nests and find something that they all had in common. These are the ideas the children had:
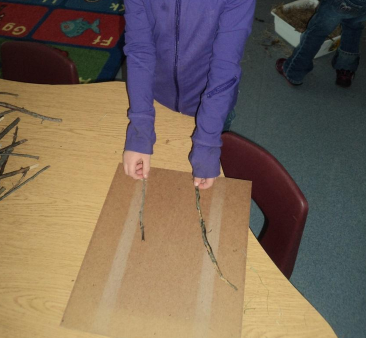
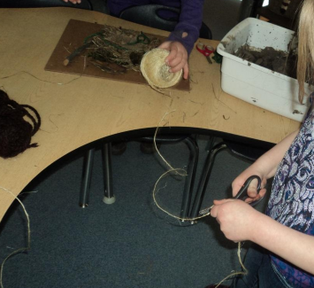
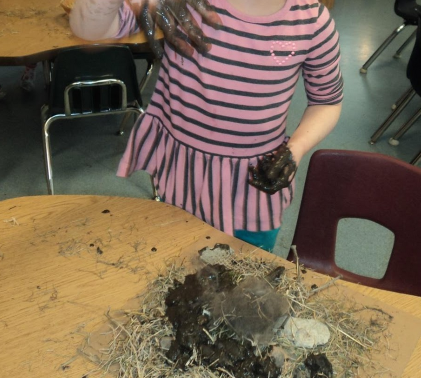
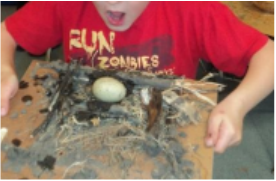
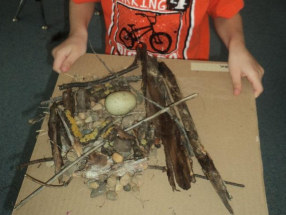
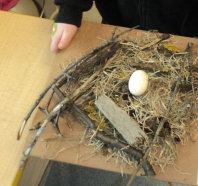
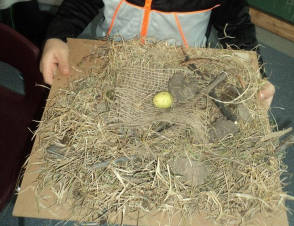
With that in mind, the children were sent back to their nests to make some adjustments. This time, they had to pass the egg test. If the egg falls out when the wind blows, they would have to fix the nest so that it wouldn’t. It was so amazing to watch the kids fine-tune what they had already created.
After Day 2, the children thought they had the perfect nests and called it a day.
Clean-Up!
Now that our building is done, the children were challenged to use their imaginations to create a bird to live in their nest. The children drew a picture of what their bird would look like and what it would be called. Literature Link:
 The children did such a great job creating birds in their imaginations that we wondered what kind of egg their bird would lay. After reading “An Egg is Quiet” by Dianna Hutts Aston, the children learned that eggs can have many different colours, shapes, sizes, and textures. That was all the information we needed. The kids went straight to work.
Curricular Objectives Covered by our Nest Project
Science I can explore and investigate objects in the environment I can generate ideas to make sense of objects and relationships I can demonstrate some ways of organizing materials (i.e. collecting, arranging, creating, and transporting) I can select and works with a variety of materials to build structures I can use materials for a purpose I know that I need to take care of materials and use them without wasting them I have started to use some technology in my learning activities I am aware of the importance of protecting the environment I can describe a home for a bird I can recognize familiar animals, what they look like, and where they live I can identify familiar shapes in the environment (i.e. circles) I know there are different colours, shapes, patterns, and textures in the environment Math I can tell you what is the same and what is different in living things, objects, and materials I can describe objects in my environment, sort objects according to things that are the same, and match objects as going together I can compare objects based on length I can build and describe 3-D objects Language Arts I can suggest ways to gather ideas and information I can find information from a variety of different places I can use pictures, photographs, and video programs to find information I can use new words and vocabulary associated with our project I can ask questions to understand new information I can identify some individual words in texts and on the word wall I can recognize capital letters and periods in print texts I can write a sentence I can speak in a clear voice to share ideas and information I can make comments about what we are talking about I can connect letters with sounds in words I can hear and identify dominant sounds in spoken words I can use drawings to illustrate ideas and information I can listen to the ideas of others Creative Expression I can experiment with a variety of art materials to create 2- and 3-D forms I can use past experiences to develop new ideas I can explore familiar materials in new ways I can respond to and interpret visual images, by viewing natural forms |
Categories
All
AuthorsThis blog and resources website has been developed through the work of various AISI coaches in PHRD. The lead collaborative teachers for the 2015/2016 school year, Cheryl Frose, Christine Quong and Tammy Tkachuk will continue to update this site. If you have resources you would like to share or would like to contribute to the blog, please contact us. Archives
May 2016
|
PHRD Connections


 RSS Feed

